Using Skin and Font in the POS
Connecting skin, font, and color for menus
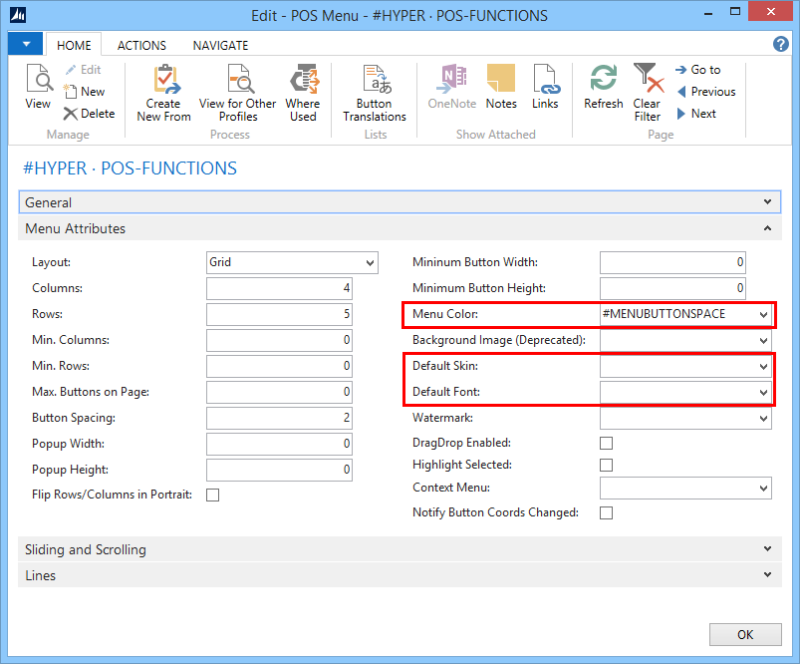
It is possible to connect Skin, Font and Color for a menu:
- Open the menu in Edit mode.
- Select the Menu Attributes FastTab.
- Select a value into the following fields, this value has to be setup in the Style Profile:
- Color in the Menu Color field.
- Skin in the Default Skin field.
- Font in the Default Font field.
- By doing this it is possible to have a whole menu with a fixed look; that is, all the menu lines in this menu will take the same values (with some exceptions explained later).
Example: Menu attributes for the menu #STATUSBAR
This is the Status bar in the HYPER POS:

This is the Menu Attributes for menu STATUSBAR:
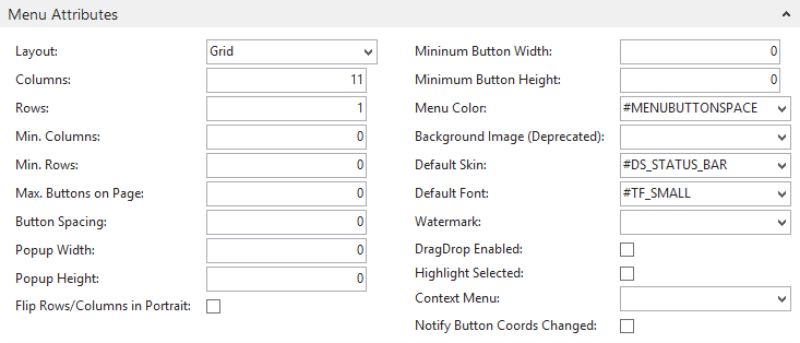
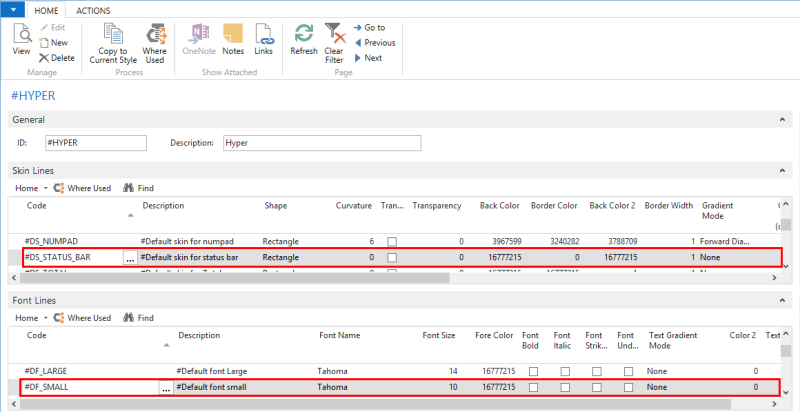
The setup for skin #DS_STATUS_BAR and font #TF_SMALL in Style Profile Hyper
The menu Color id #MENUBUTTONSPACE does not exists in the #HYPER POS Profile. This color line setup exists in the ##DEFAULT POS Style Profile.
The POS in this case has active profiles as #HYPER, so when the POS Color Line #MENUBUTTONSPACE does not exists in #HYPER the system automatically looks for it in the ##DEFAULT Profile according to the default concept.
Note: It can be valid to fill out only one or some of the Style setup fields. Empty fields use the ##DEFAULT setup within the Style.
The input for the Menu for the Skin, Font and Color line will only display the code ID; the name of the profile is irrelevant for this setup. The setup is done generally and not linked to any specific Style Profile. The active Style is decided when the POS starts.
Connecting skin and font for menu lines
It is possible to connect Skin, Font and Color for a menu line that is for individual buttons:
- Open the Menu that the button is part of.
- Go to the Lines FastTab.
- Select the Menu line.
- Click Assist to open POS Button Properties.
- On the General tab insert a relevant value for the Skin and Font fields.
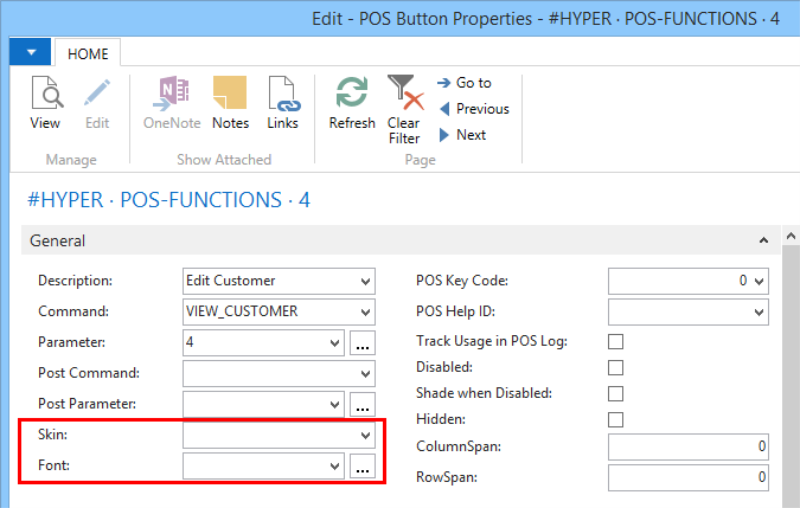
Tip: The quick way to select Skin and Font for menu lines is to edit the fields directly in the menu lines.
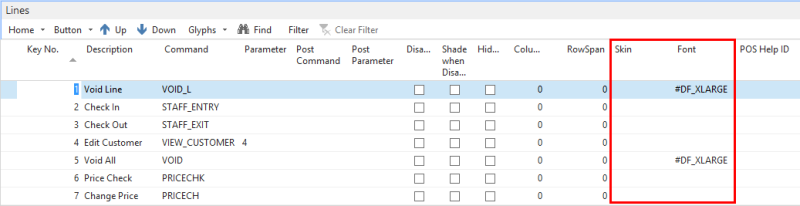
Note: Value for Skin and Font in Menu lines overwrites what is set for the Menu
Header.
Skin and font for POS commands
It is possible to set Skin and Font Codes for POS Commands. This is done generally for the company.
POS Command setup is the same for all stores and is not fixed for any profile.
To open commands go to:
List of POS commands:
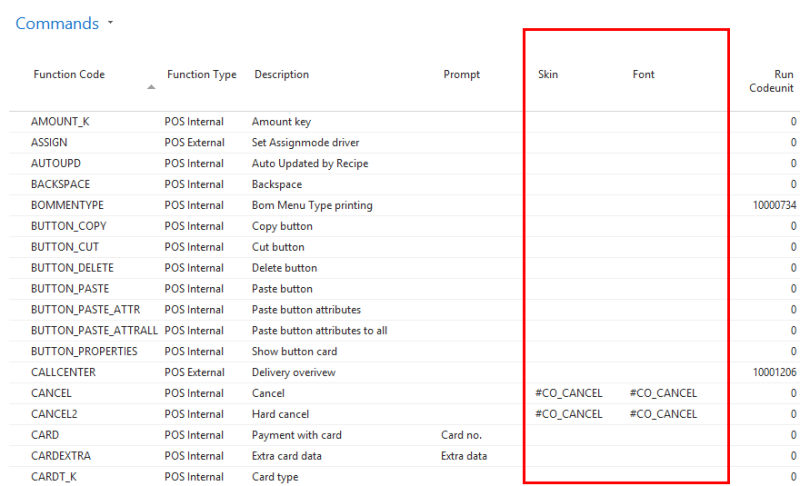
The above image displays only part of the POS commands. There are many of them in the system.
Select the desired Skin and Font Code for the commands that should have a fixed look. By doing this, the Commands with a fixed Skin and Font are set up once and there is no need to edit lots of menus/menu lines
Note: The Skin and Font code set with the Commands are not displayed with these commands in the menus and menu lines. An empty value for a command in a menu/menu line will always look for a value with the command and if no value is found then the ##DEFAULT value is used. A value for a command in a menu/menu line overrules what is set up for the command.
Tip: It is an option to setup the Skin and Font Codes for the Commands.
It might be an idea to only set the skin and font for most common commands like Cancel, Logoff and so on.
Skin, font, and colors for controls
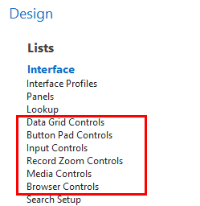
The Interface Profile has new controls as is described in the section on Interface.
One feature of the Interface Profile Controls is that the Skin, Font and Color codes can be set up for some of the Interface Profile’s Controls.
Example of a Control is the Data Grid Control #LOOKUPGRID. This is the grid used by the POS Command LOOKUP:

In the above picture the active Style is Hyper.
- The lines are light grey as is set up in color #GR_GRIDLINECOLOR
- The background is white as is set up in color ##DEFAULT
- The selected Header button No is light green as is defined in the #TA_HEADER_ACTIVE skin
- The other buttons in the Header are dark green as is defined in the Header Button Skin #TA_HEADER
- There are more skin and font setups in this Data Grid for the Rows